
vue3安装在线构建ckeditor5教程
匿名 · 更新于 2022/7/3
第一步 访问 https://ckeditor.com/ckeditor-5/online-builder/
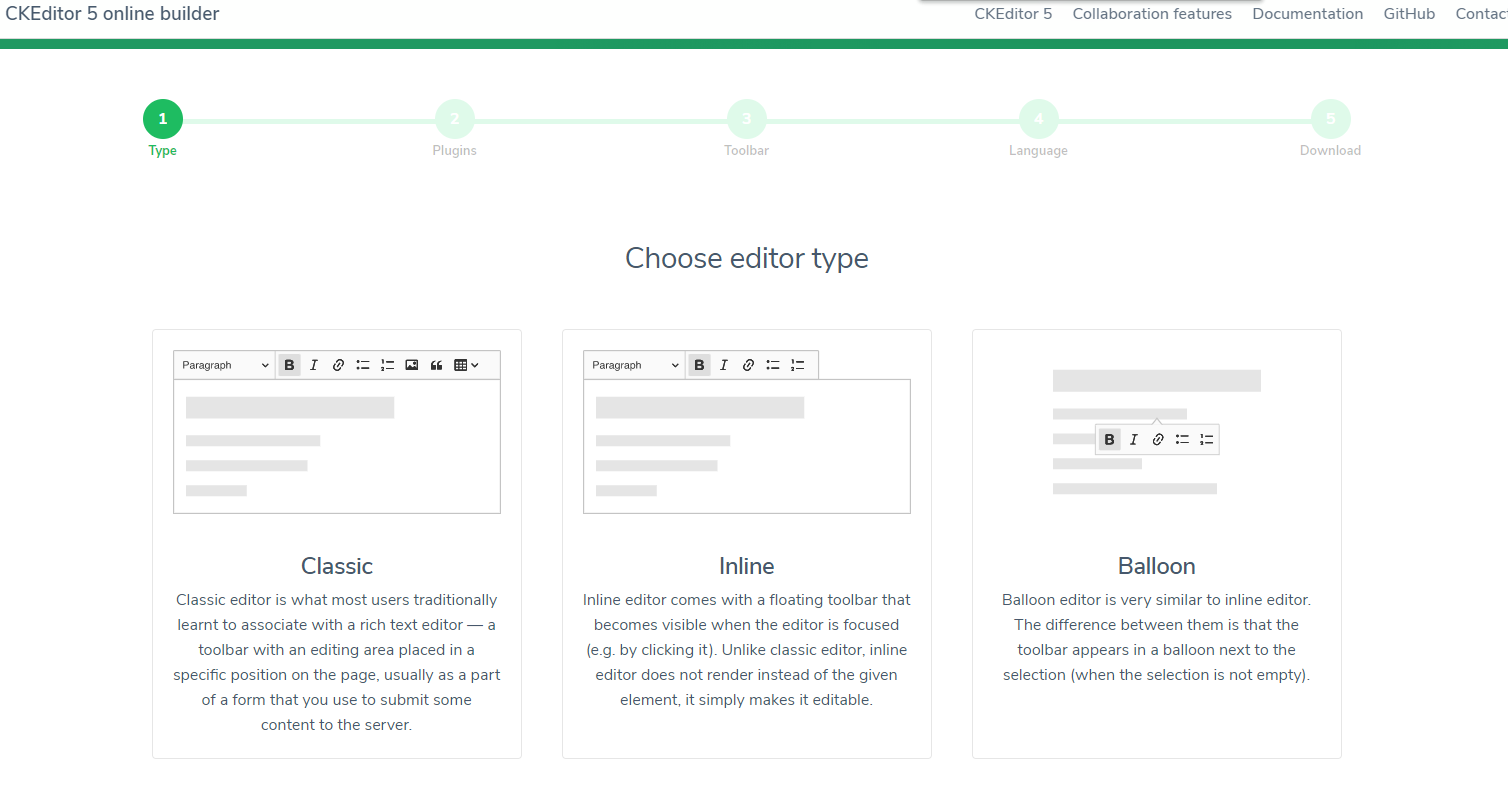
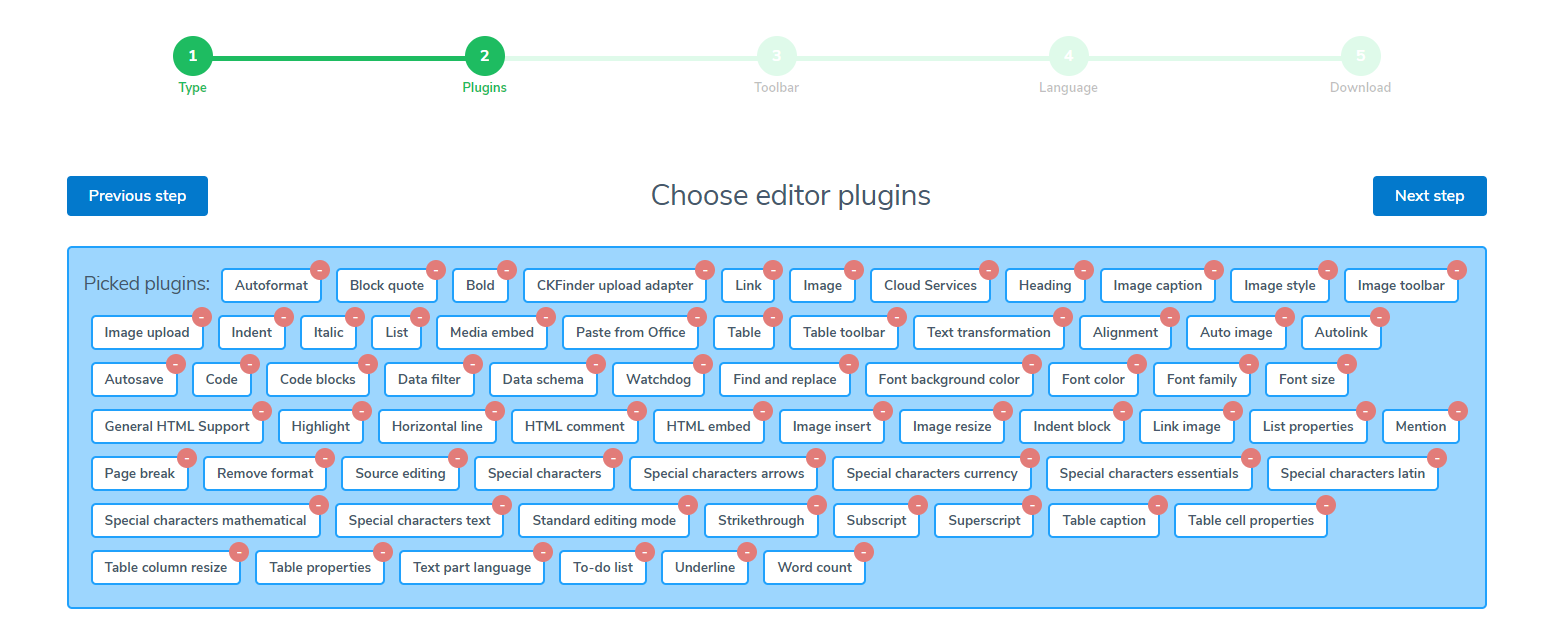
第二步 选择Classic 根据自身需求选择需要的ckeditor5插件 注意带有  标识的为收费插件,选择好后点击Next step,进入下一步
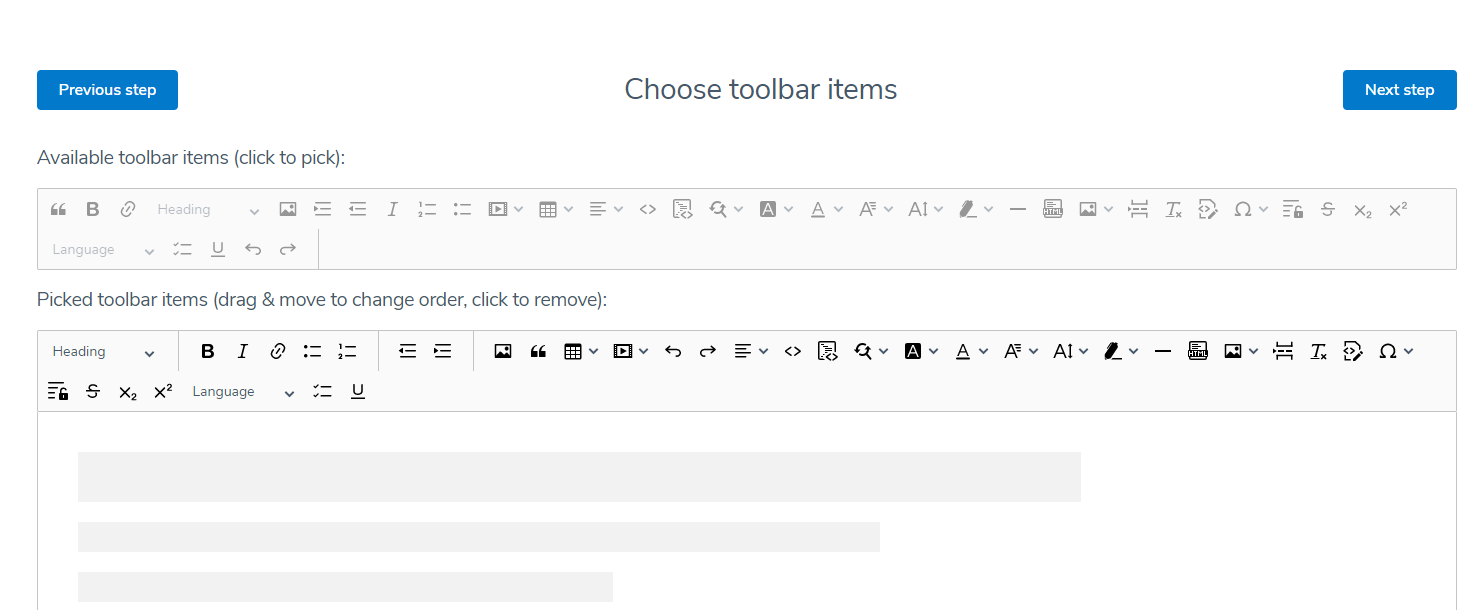
第三步 选择工具栏默认显示的插件,并可以进行排序设置,选择Next step 进入下一步
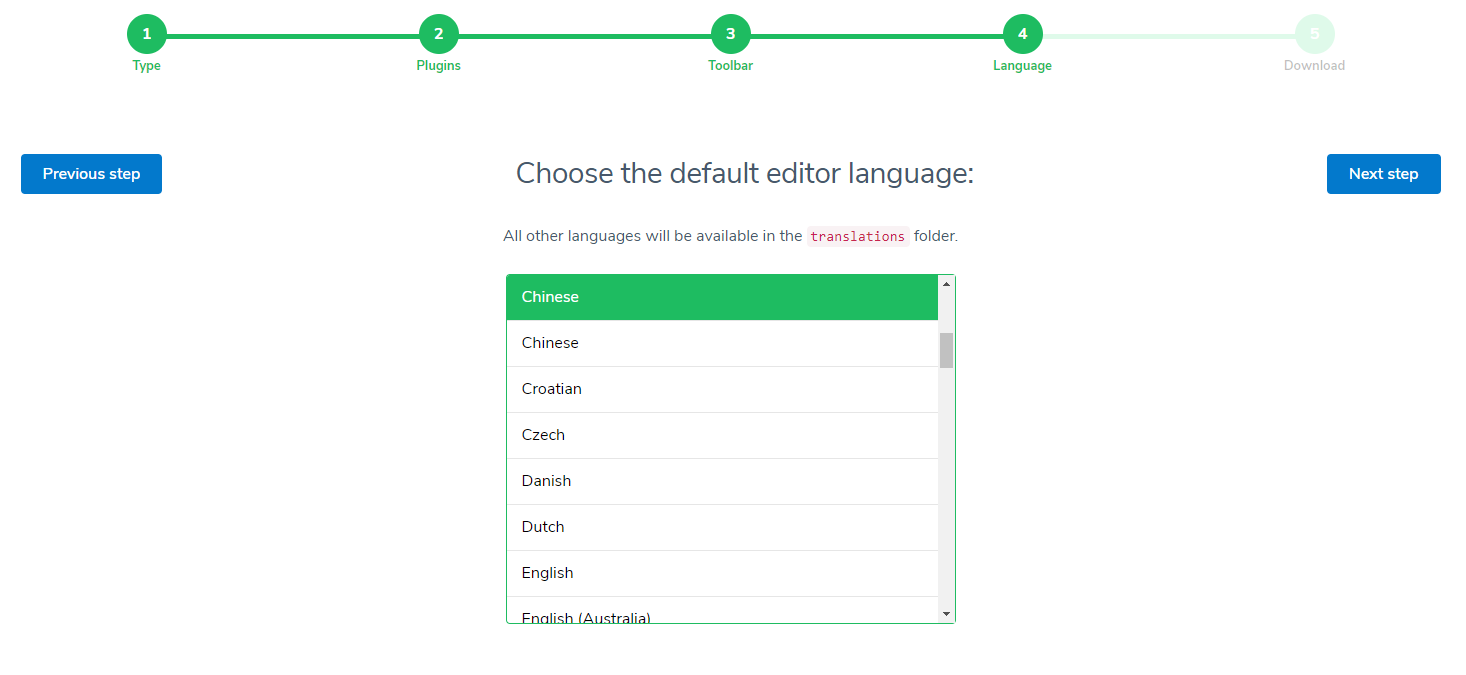
第四步 选择语言,简体中文选择第一个Chinese, 点击Next step进入下一步
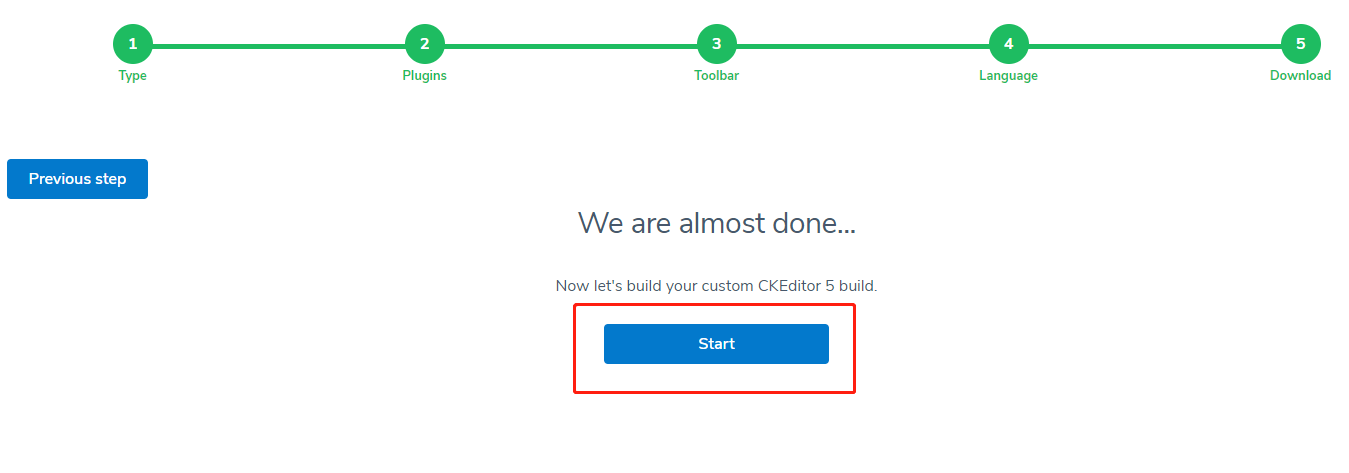
第五步 点击Start按钮 生成自定义构建压缩包, 然后点击 Download your custom CKEditor 5 build 按钮开始下载
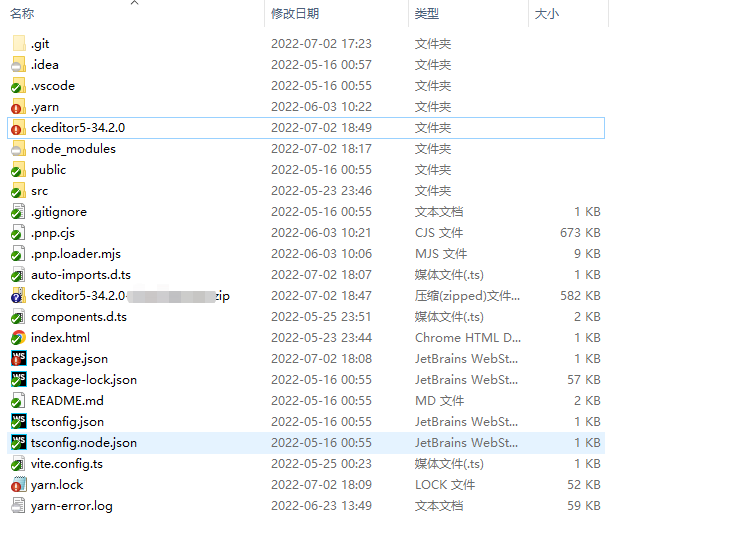
第六步 下载完成后,可以得到一个ckeditor5-34.2.0-xxxx.zip的压缩包,然后直接将压缩包剪切到vue3根目录下并解压,修改解压后目录为ckeditor5-34.2.0,目录结构如下
第七步 在项目目录下,运行命令 yarn add @ckeditor/ckeditor5-vue 安装 @ckeditor/ckeditor5-vue
第八步 在项目目录下, 运行命令 yarn add file:./ckeditor5-34.2.0 安装自定义构建ckeditor(注意:最近发现yarn2.0版本运行该命令会报错,如遇到这种情况,
可尝试直接将以下代码放入package.json的dependencies中,再运行yarn install 或 yarn进行安装
"ckeditor5-custom-build": "file:./ckeditor5-34.2.0"
第九步 在main.ts文件中引入ckeditor 如下图
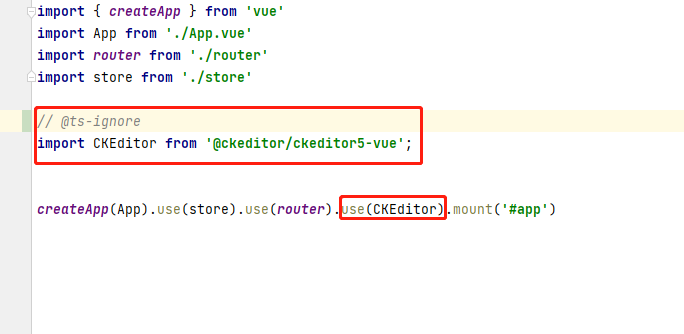
如果不想在全局引入Ckeditor5,只在需要的vue组件中使用的话,可以不做以上main.ts修改,只在需要使用ckeditor5的vue组件中加入以下代码即可
// @ts-ignore
import CKEditor from '@ckeditor/ckeditor5-vue';
const ckeditor = CKEditor.component;
第十步 在需要Ckeditor的vue页面中,使用即可,代码如下
<template> <div> <ckeditor :editor="state.editor" v-model="state.editorData" :config="state.editorConfig"></ckeditor> </div> </template><script lang="ts" setup> import {nextTick, onMounted, reactive} from "vue"; // @ts-ignore import {Editor as ClassicEditor} from 'ckeditor5-custom-build/build/ckeditor';
const state = reactive({ editor: ClassicEditor, editorData: '', editorConfig: { // The configuration of the editor. } })
</script>
<style scoped>
</style>
运行效果图如下:

另外如果想调整工具栏中插件的顺序、对插件进行分组或者删减不常用的插件,可以在editorConfig中进行自定义配置,下方附一份配置示例
<template> <div> <ckeditor :editor="state.editor" v-model="state.editorData" :config="state.editorConfig"></ckeditor> </div> </template><script lang="ts" setup> import {nextTick, onMounted, reactive} from "vue";
// @ts-ignore import {Editor as ClassicEditor} from 'ckeditor5-custom-build/build/ckeditor';
const state = reactive({ editor: ClassicEditor, editorData: '', editorConfig: { // The configuration of the editor. toolbar: { items: [ 'undo', 'redo', '|', 'findAndReplace', 'selectAll', '|', 'heading', '|', 'removeFormat', 'bold', 'italic', 'strikethrough', 'underline', 'code', 'subscript', 'superscript', '|', 'specialCharacters', 'horizontalLine', 'pageBreak', '|', '-', 'highlight', 'fontSize', 'fontFamily', 'fontColor', 'fontBackgroundColor', '|', 'link', 'blockQuote', 'insertTable', 'uploadImage', 'codeBlock', 'htmlEmbed', '|', 'bulletedList', 'numberedList', 'todoList', '|', 'outdent', 'indent', 'alignment', '|', 'textPartLanguage', '|', 'sourceEditing' ], shouldNotGroupWhenFull: true }, } })
</script>
<style scoped>
</style>
配置后效果如下图
