
11、Angular HTTP Client 快速入门
匿名 · 更新于 2018/8/27
开发工具:Visual Studio Code
在Angular 4.3中引入了新的HttpClientModule。 这个新模块可以在@ angular / common / http包中找到,并且可以完全重新实现前一个HttpModule。新的HttpClient服务包含在HttpClientModule中,可用于启动HTTP请求并处理应用程序中的响应。
安装 4.3 项目
开始Angular 4.3项目第一步。最简单的是用Angular CLI (Angular command line interface).
- 如果系统还没有安装过Angular CLI ,先要执行下面的命令安装最新版(-g:全局安装):
npm install -g @angular/cli@latest
如果有安装cnpm,可用cnpm,下载速度更快
cnpm install -g @angular/cli@latest - 新建一个文件夹ng_http,用来存放项目。命令行切换到此目录,然后用VS Code打开。
cd D:\Angular\NG_App
code . - 接着,就可以使用 ng命令了开始一个新的Angular 项目了:
ng new nghttp01
如果报错,并在错误日志记录总显示
integrity checksum failed when using sha512
npm4升级npm5,在运行 npm install 时,可能会包这样的错误,执行
npm cache clean --force
删除项目文件夹,重新执行。
ng new nghttp01
执行成功后会产生 nghttp01文件夹与项目模板,依赖性也会自动安装。 - 检查并确认 package.json 中Angular相关所有依赖版本 号 >4.3.0。
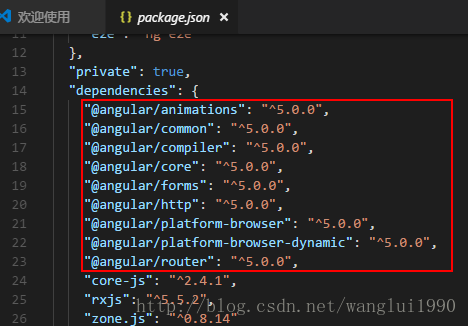
- package.json 文件做过更新后,命令行中切换到nghttp01下,执行下面命令更新
npm install
在项目中启用 HttpClient
1。为了在项目components 中使用 HttpClient 服务,第一步就是要在Angular应用中把 HttpClientModule 包含进来。首先在应用根module中导入 HttpClient module,对应文件app.module.ts。
import { BrowserModule } from '@angular/platform-browser';
import { NgModule } from '@angular/core';
import { HttpClientModule } from '@angular/common/http';//新增行
import { AppComponent } from './app.component';
@NgModule({
  declarations: [
    AppComponent
  ],
  imports: [
    BrowserModule,
    HttpClientModule //新增行
  ],
  providers: [],
  bootstrap: [AppComponent]
})
2。上一步在根 Module 导入了HttpClientModule ,就可以在components中使用HttpClient了。使用HttpClient第一步是导入(import),还必须要注入(inject )到component class的构造函数中。如下所示:
import { Component } from '@angular/core';
import { HttpClient } from '@angular/common/http';//新增行
@Component({
  selector: 'app-root',
  templateUrl: './app.component.html',
  styleUrls: ['./app.component.css']
})
export class AppComponent  {
  title = 'app';
  constructor(private http: HttpClient){//新增行,httpclient注入到构造函数中,以使HttpClient可用。
  }
}
3。HttpClient使用XMLHttpRequest浏览器API来执行HTTP请求。 为了执行特定类型的HTTP请求,可以使用以下与HTTP动词相对应的方法:
**get
post
put
delete
patch
head
jsonp**
使用HttpClient 请求数据
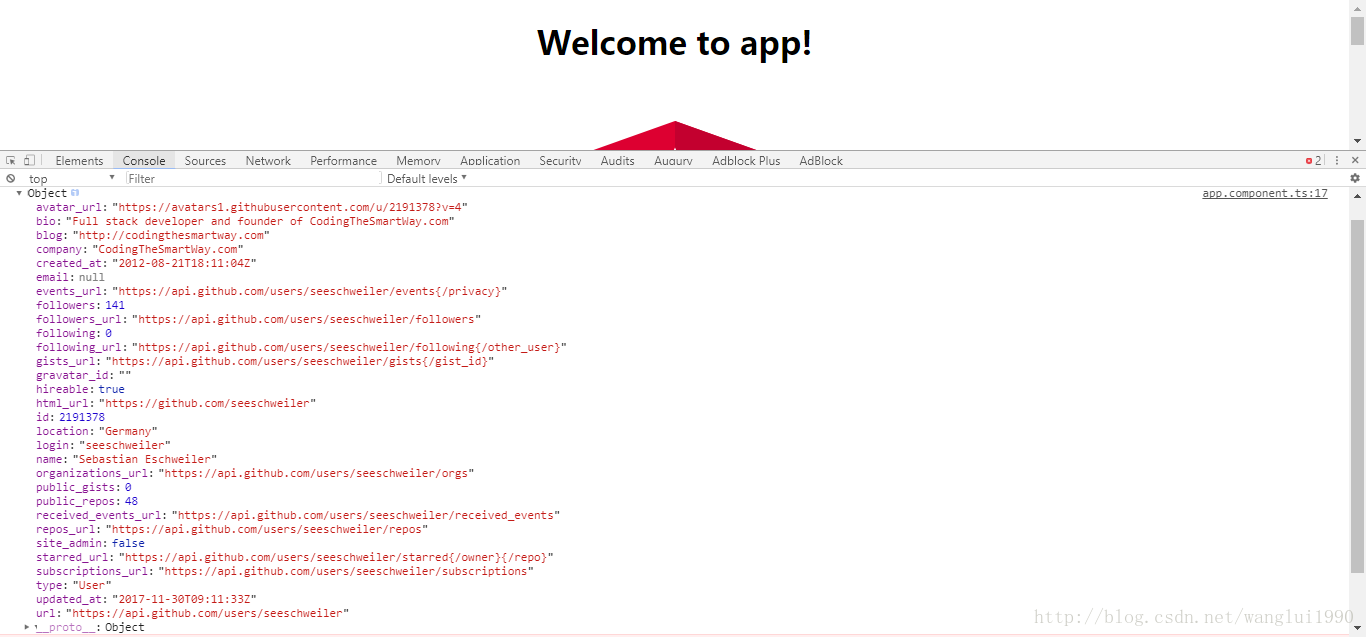
1。 简单示例:使用 GitHub’s REST API 请求用户数据。修改app.component.ts代码(完整):
import { Component, OnInit } from '@angular/core';//新增导入OnInit
import { HttpClient } from '@angular/common/http';//新增行
@Component({
  selector: 'app-root',
  templateUrl: './app.component.html',
  styleUrls: ['./app.component.css']
})
export class AppComponent implements OnInit {//新增implements OnInit
  title = 'app';
  results = '';
  constructor(private http: HttpClient){///新增行,httpclient注入到构造函数中,以使HttpClient可用。
  }
  //新增ngOnInit()方法
  ngOnInit(): void {    this.http.get('https://api.github.com/users/seeschweiler').subscribe(data => {
      console.log(data);
    });
  }
}
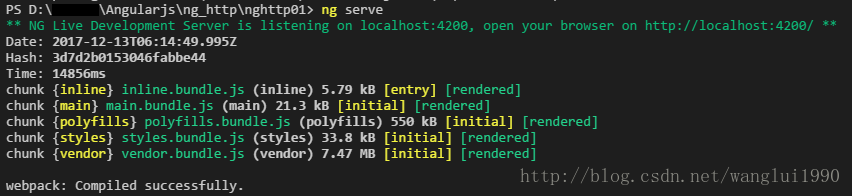
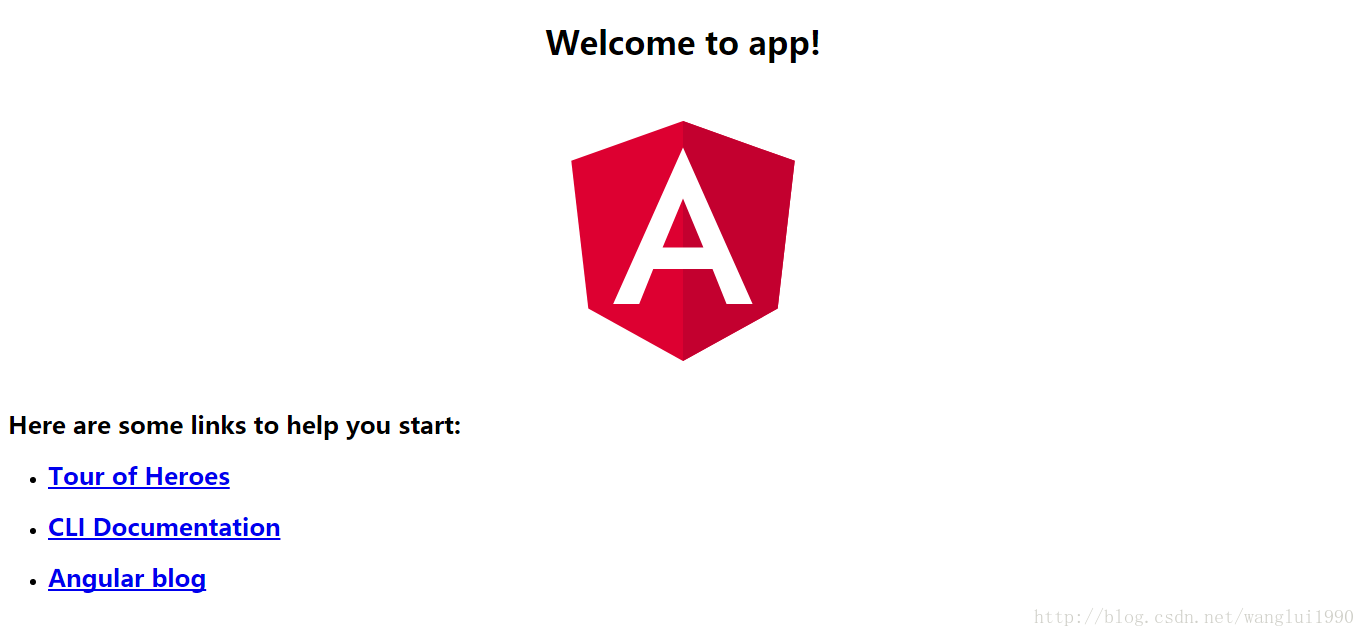
2。项目启动:VS Code命令行执行。网页访问http://localhost:4200/
ng serve
之前 激动人心的 Angular HttpClient 这篇文章已经介绍过 HttpClient ,今天看到 angular-university 博客中介绍 HttpClient 的文章,内容很详细,我就简单做了整理。有兴趣的话,建议直接阅读 原文。
HttpClientModule 应用
导入新的 HTTP Module
import {HttpClientModule} from '@angular/common/http';

@NgModule({
    declarations: [
        AppComponent
    ],
    imports: [
        BrowserModule,
        HttpClientModule
    ],
    providers: [],
    bootstrap: [AppComponent]
})
export class AppModule {}
需要注意的是,现在 JSON 是默认的数据格式,我们不需要再进行显式的解析。即我们不需要再使用以下代码:
http.get(url).map(res => res.json()).subscribe(...)
现在我们可以这样写:
http.get(url).subscribe(...)
发送 Get 请求
import {Component, OnInit} from '@angular/core';
import {Observable} from "rxjs/Observable";
import {HttpClient} from "@angular/common/http";
import * as _ from 'lodash';

interface Course {
    description: string;
    courseListIcon:string;
    iconUrl:string;
    longDescription:string;
    url:string;
}

@Component({
  selector: 'app-root',
  template: `
      <ul *ngIf="courses$ | async as courses else noData">
          <li *ngFor="let course of courses">
              {{course.description}}
          </li>
      </ul>
      <ng-template #noData>No Data Available</ng-template>
  `})
export class AppComponent implements OnInit {
    courses$: Observable<any>;
    constructor(private http:HttpClient) {}

    ngOnInit() {
        this.courses$ = this.http
            .get("https://angular-http-guide.firebaseio.com/courses.json")
            .map(data => _.values(data))
            .do(console.log);
    }
}
设置查询参数
假设发送 Get 请求时,需要设置对应的查询参数,预期的 URL 地址如下:
https://angular-http-guide.firebaseio.com/courses.json?orderBy="$key"&limitToFirst=1
创建 HttpParams 对象
import {HttpParams} from "@angular/common/http";

const params = new HttpParams()
    .set('orderBy', '"$key"')
    .set('limitToFirst', "1");

this.courses$ = this.http
    .get("/courses.json", {params})
    .do(console.log)
    .map(data => _.values(data))
需要注意的是,我们通过链式语法调用 set() 方法,构建 HttpParams 对象。这是因为 HttpParams 对象是不可变的,通过 set() 方法可以防止该对象被修改。
每当调用 set() 方法,将会返回包含新值的 HttpParams 对象,因此如果使用下面的方式,将不能正确的设置参数。
const params = new HttpParams();

params.set('orderBy', '"$key"')
params.set('limitToFirst', "1");
使用 fromString 语法
const params = new HttpParams({fromString: 'orderBy="$key"&limitToFirst=1'});
使用 request() API
const params = new HttpParams({fromString: 'orderBy="$key"&limitToFirst=1'});

this.courses$ = this.http
    .request(
        "GET",
        "/courses.json",
        {
            responseType:"json",
            params
        })
    .do(console.log)
    .map(data => _.values(data));
设置 HTTP Headers
const headers = new HttpHeaders().set("X-CustomHeader", "custom header value");

this.courses$ = this.http
    .get(
        "/courses.json",
        {headers})
    .do(console.log)
    .map(data => _.values(data));
发送 Put 请求
httpPutExample() {
    const headers = new HttpHeaders().set("Content-Type", "application/json");

    this.http.put("/courses/-KgVwECOnlc-LHb_B0cQ.json",
        {
            "courseListIcon": ".../main-page-logo-small-hat.png",
            "description": "Angular Tutorial For Beginners TEST",
            "iconUrl": ".../angular2-for-beginners.jpg",
            "longDescription": "...",
            "url": "new-value-for-url"
        },
        {headers})
        .subscribe(
            val => {
                console.log("PUT call successful value returned in body",
                  val);
            },
            response => {
                console.log("PUT call in error", response);
            },
            () => {
                console.log("The PUT observable is now completed.");
            }
        );
}
发送 Patch 请求
httpPatchExample() {
    this.http.patch("/courses/-KgVwECOnlc-LHb_B0cQ.json",
        {
            "description": "Angular Tutorial For Beginners PATCH TEST",
        })
        .subscribe(
            (val) => {
                console.log("PATCH call successful value returned in body",
                  val);
            },
            response => {
                console.log("PATCH call in error", response);
            },
            () => {
                console.log("The PATCH observable is now completed.");
            });
}
发送 Delete 请求
httpDeleteExample() {
    this.http.delete("/courses/-KgVwECOnlc-LHb_B0cQ.json")
        .subscribe(
            (val) => {
                console.log("DELETE call successful value returned in body",
                  val);
            },
            response => {
                console.log("DELETE call in error", response);
            },
            () => {
                console.log("The DELETE observable is now completed.");
            });
}
发送 Post 请求
httpPostExample() {
    this.http.post("/courses/-KgVwECOnlc-LHb_B0cQ.json",
        {
            "courseListIcon": "...",
            "description": "TEST",
            "iconUrl": "..",
            "longDescription": "...",
            "url": "new-url"
        })
        .subscribe(
            (val) => {
                console.log("POST call successful value returned in body",
                  val);
            },
            response => {
                console.log("POST call in error", response);
            },
            () => {
                console.log("The POST observable is now completed.");
            });
}
避免重复请求
duplicateRequestsExample() {
    const httpGet$ = this.http
        .get("/courses.json")
        .map(data => _.values(data));

    httpGet$.subscribe(
        (val) => console.log("logging GET value", val)
    );

    this.courses$ = httpGet$;
}
在上面例子中,我们正在创建了一个 HTTP observable 对象 httpGet$,接着我们直接订阅该对象。然后,我们把 httpGet$ 对象赋值给 courses$ 成员变量,最后在模板中使用 async 管道订阅该对象。
这将导致发送两个 HTTP 请求,在这种情况下,请求显然是重复的,因为我们只希望从后端查询一次数据。为了避免发送冗余的请求,我们可以使用 RxJS 提供的 shareReplay 操作符:
// put this next to the other RxJs operator imports
import 'rxjs/add/operator/shareReplay';

const httpGet$ = this.http
    .get("/courses.json")
    .map(data => _.values(data))
    .shareReplay();
并行发送多个请求
并行发送 HTTP 请求的一种方法是使用 RxJs 中的 forkjoin 操作符:
import 'rxjs/add/observable/forkJoin';

parallelRequests() {

    const parallel$ = Observable.forkJoin(
        this.http.get('/courses/-KgVwEBq5wbFnjj7O8Fp.json'),
        this.http.get('/courses/-KgVwECOnlc-LHb_B0cQ.json')
    );

    parallel$.subscribe(
        values => {
            console.log("all values", values)
        }
    );
}
顺序发送 Http 请求
sequentialRequests() {
    const sequence$ = this.http.get<Course>('/courses/-KgVwEBq5wbFnjj7O8Fp.json')
        .switchMap(course => {
            course.description+= ' - TEST ';
            return this.http.put('/courses/-KgVwEBq5wbFnjj7O8Fp.json', course)
        });

    sequence$.subscribe();
}
获取顺序发送 Http 请求的结果
sequentialRequests() {
    const sequence$ = this.http.get<Course>('/courses/-KgVwEBq5wbFnjj7O8Fp.json')
        .switchMap(course => {
            course.description+= ' - TEST ';
            return this.http.put('/courses/-KgVwEBq5wbFnjj7O8Fp.json', course)
        },
            (firstHTTPResult, secondHTTPResult)  => [firstHTTPResult, secondHTTPResult]);

    sequence$.subscribe(values => console.log("result observable ", values) );
}
请求异常处理
throwError() {
    this.http
        .get("/api/simulate-error")
        .catch( error => {
            // here we can show an error message to the user,
            // for example via a service
            console.error("error catched", error);

            return Observable.of({description: "Error Value Emitted"});
        })
        .subscribe(
            val => console.log('Value emitted successfully', val),
            error => {
                console.error("This line is never called ",error);
            },
            () => console.log("HTTP Observable completed...")
        );
}
当发生异常时,控制台的输出结果:
Error catched

HttpErrorResponse {headers: HttpHeaders, status: 404, statusText: "Not Found", url: "http://localhost:4200/api/simulate-error", ok: false, … }

Value emitted successfully {description: "Error Value Emitted"}
HTTP Observable completed...
Http 拦截器
定义拦截器
import {Injectable} from "@angular/core";
import {HttpEvent, HttpHandler, HttpInterceptor} from "@angular/common/http";
import {HttpRequest} from "@angular/common/http";
import {Observable} from "rxjs/Observable";

@Injectable()
export class AuthInterceptor implements HttpInterceptor {

    constructor(private authService: AuthService) {
    }

    intercept(req: HttpRequest<any>, next: HttpHandler): Observable<HttpEvent<any>> {
        const clonedRequest = req.clone({
            headers: req.headers.set('X-CustomAuthHeader', authService.getToken())
        });
        console.log("new headers", clonedRequest.headers.keys());
        return next.handle(clonedRequest);
    }
}
配置拦截器
@NgModule({
    declarations: [
        AppComponent
    ],
    imports: [
        BrowserModule,
        HttpClientModule
    ],
    providers: [
        [ { provide: HTTP_INTERCEPTORS, useClass: AuthInterceptor, multi: true } ]
    ],
    bootstrap: [AppComponent]
})
export class AppModule { }
Http 进度事件
longRequest() {
    const request = new HttpRequest(
        "POST", "/api/test-request", {},
         {reportProgress: true});

    this.http.request(request)
        .subscribe(
            event => {
                if (event.type === HttpEventType.DownloadProgress) {
                    console.log("Download progress event", event);
                }
                if (event.type === HttpEventType.UploadProgress) {
                    console.log("Upload progress event", event);
                }
                if (event.type === HttpEventType.Response) {
                    console.log("response received...", event.body);
                }
            }
        );
}
上面示例运行后,控制台的可能的输出结果:
Upload progress event Object {type: 1, loaded: 2, total: 2}
Download progress event Object {type: 3, loaded: 31, total: 31}
Response Received... Object {description: "POST Response"}
POST请求实例
  let formData: FormData = new FormData();
  let myparams: { [key: string]: string; } = this.myfun.getParams({
    'openid': this.ls.getObject('openid')
  });
  formData = this.myfun.formDataPaaramsProcess(formData, myparams);
  this.http.post(this.myfun.getConfig('api_url') + 'AssistantBibiOrders/getMyBibiList',
    formData).subscribe(
        (val) => { // 请求成功处理
            console.log('POST call successful value returned in body',val);
        },
        response => {  // 请求失败
            console.log('POST call in error', response);
        },
        () => { // 处理完成回调
            console.log('The POST observable is now completed.');
        }
    );